

Home / Product Installation Instructions
Tile trim
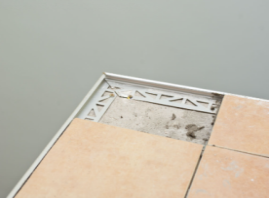
Tile trim not only adds a professional finish to your tiling project but also protects the edges from wear and tear. Follow these five easy steps for a seamless installation:

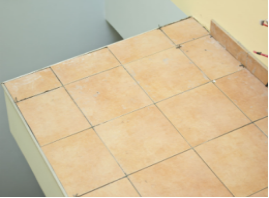
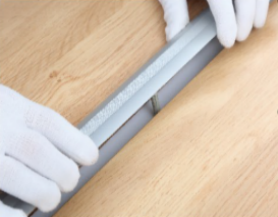
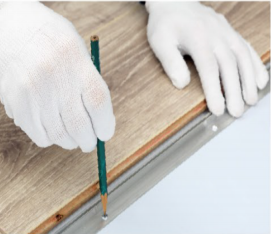
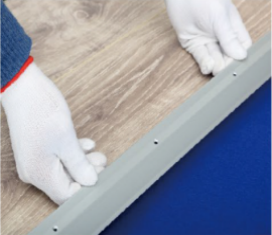
1.Measure and Cut: Begin by measuring the length of the edge you want to trim. Use these measurements to cut the tile trim to size. Make sure to use safety equipment like goggles and gloves.
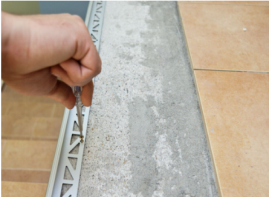
2.Apply Adhesive: Apply a suitable adhesive to the back of the trim. Press it firmly onto the edge of the tile, ensuring it's aligned perfectly.
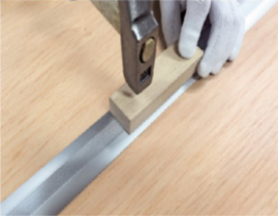
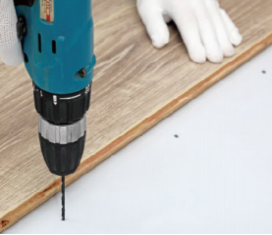
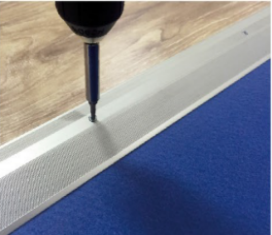
3.Secure with Nails: If needed, secure the trim with nails or screws at intervals. Ensure they are flush with the trim's surface.
4.Fill the Gap: Use grout or caulk to fill the gap between the trim and the tiles. This prevents water from seeping in and maintains a clean look.
5.Finishing Touch: Wipe off any excess adhesive or grout, and let it dry. Buff the trim's surface to a smooth finish.
Skirting board
Skirting boards, often called baseboards, are not just a finishing touch but a functional element that protects walls and adds a touch of elegance. Follow these steps for a seamless installation:
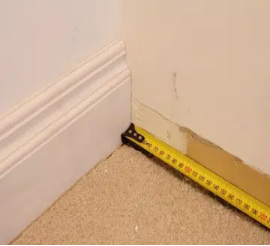
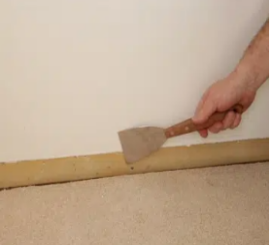
1.Measurement and Cutting: Measure the lengths needed for each wall and cut the skirting board accordingly, ensuring precise angles at corners.
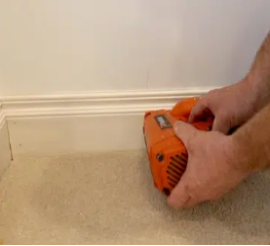
2.Prepare the Wall: Clear the wall of any obstacles and make sure it's clean and dry before installation.
3.Apply Adhesive: Apply a strong adhesive to the back of the skirting board, especially along the top edge.
4.Positioning: Carefully align the board with the wall, leaving a small gap at the bottom for expansion. Press firmly into place.
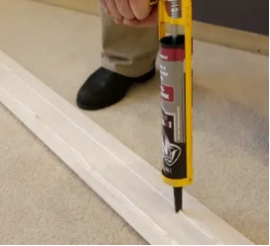
5.Securing: Optionally, use nails or screws to secure the skirting board for extra stability.
6.Filling Gaps: Fill any gaps or joints with caulk or filler, and smooth out the surface.
7.Finishing Touch: Sand, prime, and paint the skirting board to match the room's decor.
Same-Height Transitions
Same-Height Transition,offers a polished transition between walls and flooring while protecting edges. Follow these steps for a flawless installation:

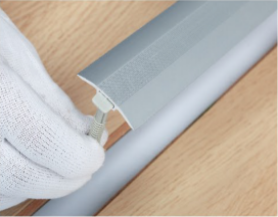
1.Measure and Cut: Measure the length needed for each wall and cut the floor trim at accurate angles, ensuring seamless corners.
2.Prepare the Area: Clean the installation area and ensure the surface is dry and even before starting.
3.Apply Adhesive: Use strong adhesive on the back of the trim, particularly along the top edge that will contact the wall.
4.Position and Secure: Align the trim with the wall and floor, leaving slight expansion gaps. Optionally, secure with nails or brads.
5.Fill and Sand: Fill gaps and nail holes with putty, and sand the surface for a smooth finish.
Sloped Transitions profile
Sloped transition profile, provides a sleek bridge between different flooring types, enhancing both aesthetics and safety. Follow these steps for a flawless installation:
1.Measurement and Cutting: Measure the width of the doorway and cut the transition trim to fit precisely.
2.Prepare Surfaces: Ensure both floors are clean and level, ready to accommodate the transition piece.
3.Apply Adhesive: Use a reliable adhesive on the bottom of the trim, which will make contact with the flooring.
4.Position and Press: Place the trim in position, aligning it evenly with both floor surfaces. Press down firmly to secure.
5.Finishing Touch: Wipe away excess adhesive, and if necessary, caulk around the edges for a seamless finish.
Carpet profile
Carpet trim, also known as a carpet transition strip, provides a clean transition between carpets and other flooring types while preventing fraying. Here's how to install it flawlessly :
1.Measurement and Cutting: Measure the doorway's width and cut the trim to fit perfectly.
2.Prepare the Area: Ensure the edges of the carpet are clean and properly stretched before installation.
3.Apply Adhesive: Use strong adhesive on the underside of the trim that will attach to the subfloor.
4.Position and Secure: Place the trim in position, aligning it evenly. Press down firmly to secure it.
5.Final Touches: Wipe away any excess adhesive and ensure the edges of the carpet are neatly tucked under the trim.
Movement joints
Movement joints, also referred to as expansion joints, play a crucial role in maintaining the structural integrity of buildings by accommodating natural expansion and contraction. Follow these steps for effective installation:
1.Determining location: Identify strategic locations where movement joints are needed based on the building's design and materials.
2.Surface Preparation: Ensure the surfaces are clean, dry, and free from debris before installation.
3.Joint Insertion: Carefully insert the movement joint material into the prepared gap, allowing room for expansion.
4.Secure Edges: Fix joint covers or protectors to prevent damage during construction.
5.Finishing: Seal the joint edges with appropriate sealants to prevent moisture penetration.
6.Regular Maintenance: Periodically inspect and maintain movement joints to ensure their effectiveness.
Stair nosing
Stair nosing, a protective edge for staircases, ensures safety while enhancing the aesthetics of your steps. Follow these steps for a secure installation:
1.Measurement: Measure the width and depth of each step accurately to cut the nosing to the correct size.
2.Cutting: Use a saw to cut the nosing to match the step dimensions, ensuring a snug fit.
3.Adhesive Application: Apply a strong adhesive to the back of the nosing, ensuring complete coverage.
4.Positioning: Place the nosing on the step's edge, aligning it precisely.
5.Securing: Press the nosing firmly, allowing the adhesive to bond effectively.
Panel profile
Panel trim, an essential detail in interior design, adds depth and elegance to walls and ceilings. Here's how to install it with finesse:
1.Measurement and Cutting: Measure the length of the wall or ceiling where trim will be applied. Cut the trim pieces to fit accurately.
2.Surface Preparation: Ensure the surface is clean, smooth, and dry before installation.
3.Adhesive Application: Apply a suitable adhesive to the back of the trim, ensuring even coverage.
4.Positioning: Align the trim with the desired location, pressing gently.
5.Securing: Optionally, use nails or brads to secure the trim in place.
6.Finishing: Fill any gaps with caulk or filler, then sand and paint or stain the trim to perfection.
Led profile
Led stair nosing
LED stair nosing is not only a safety enhancement but also a stylish addition to your staircase. Follow these steps to illuminate your path:
1.Measurement: Measure the width and length of each step accurately for precise LED nosing fit.
2.Wiring Preparation: Plan the wiring path and ensure proper electrical connections are available.
3.Nosing Placement: Gently place the LED nosing onto the step's edge, aligning it seamlessly.
4.Securing: Attach the nosing securely using adhesive or screws, following manufacturer guidelines.
5.Wiring Connection: Carefully connect the wiring, ensuring it's hidden and safely positioned.
Led skirting boards
LED skirting boards are the perfect blend of functionality and style, enhancing your space with a touch of modernity. Follow these steps to bring a subtle glow to your interiors:
1.Measurement: Measure the lengths of walls where LED skirting will be installed, ensuring precise dimensions.
2.Electrical Preparation: Plan the wiring route and ensure power connections are available for seamless installation.
3.Skirting Placement: Gently position the LED skirting against the wall, aligning it flawlessly.
4.Secure Attachment: Use adhesive or screws to secure the skirting.
5.Wiring Connection: Carefully connect the wiring, ensuring it's discreetly tucked away.
subscription
Please send your message to us
DYM DECOR has 10 years of production experience. Welcome to contact us to provide you with the perfect finish solution.
- *Tel
- *Title
- *Content